
How to Add Texture to Your Watercolor Paintings Using Rock Salt - Step By Step Video
Watercolor is a beautiful and versatile medium, I love using it to add background texture or new details to my drawings. One way I use to achieve beautiful texture within my watercolour layers is by using rock salt. In this video tutorial, I’ll show you step by step how to add texture to your watercolour using this technique.
Materials you'll need:
Watercolor paints
Watercolor paper
Brushes
Rock salt
Water
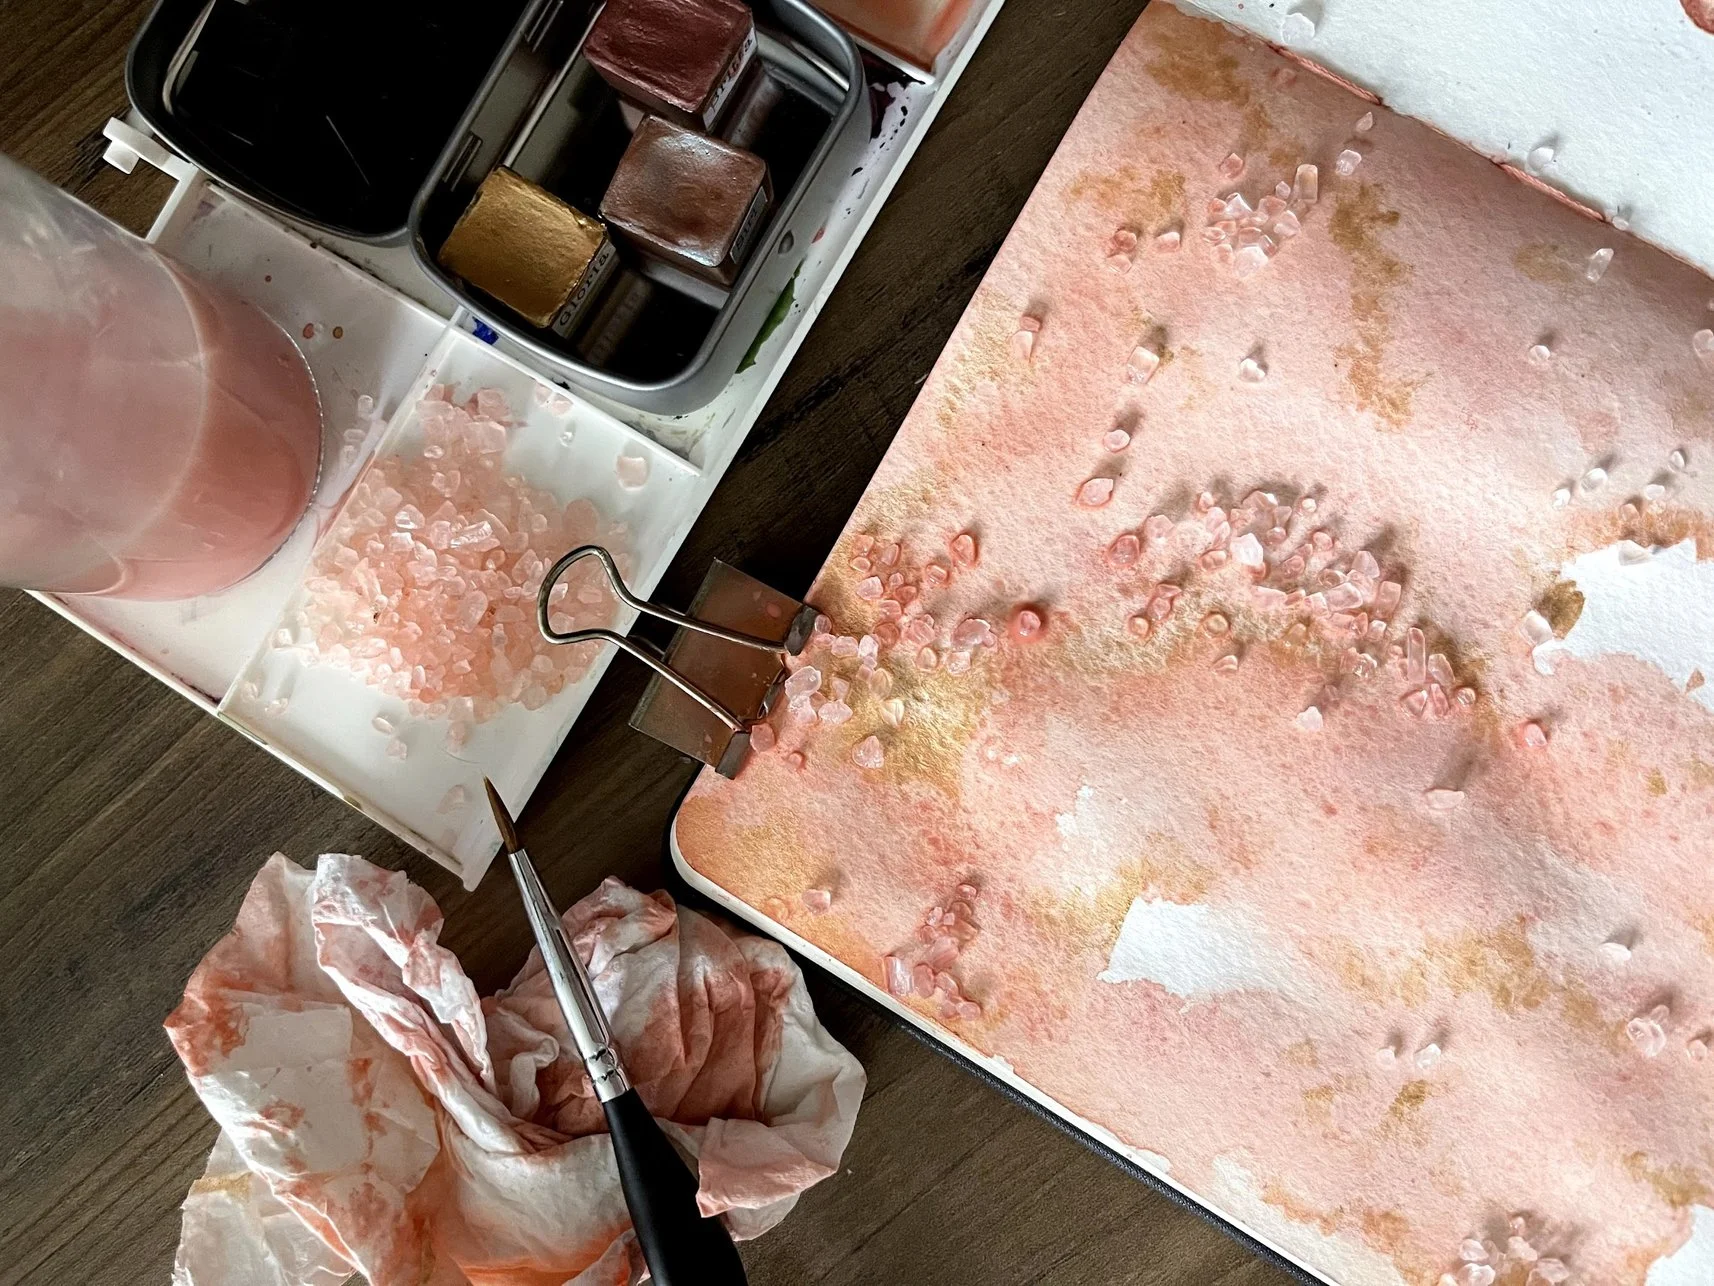
Make sure to leave the rock salt on the paper until the paint has fully dried.
Steps:
Start by painting a wash of color on your paper. Use a large brush and plenty of water to create a wet area on the paper.
While the paint is still wet, sprinkle rock salt over the area you want to add texture to. Use a coarse salt for larger textures and a fine salt for smaller textures.
Let the salt sit on the paint until it's completely dry. This can take anywhere from a few hours to overnight, depending on the size of the salt crystals and the humidity in your environment.
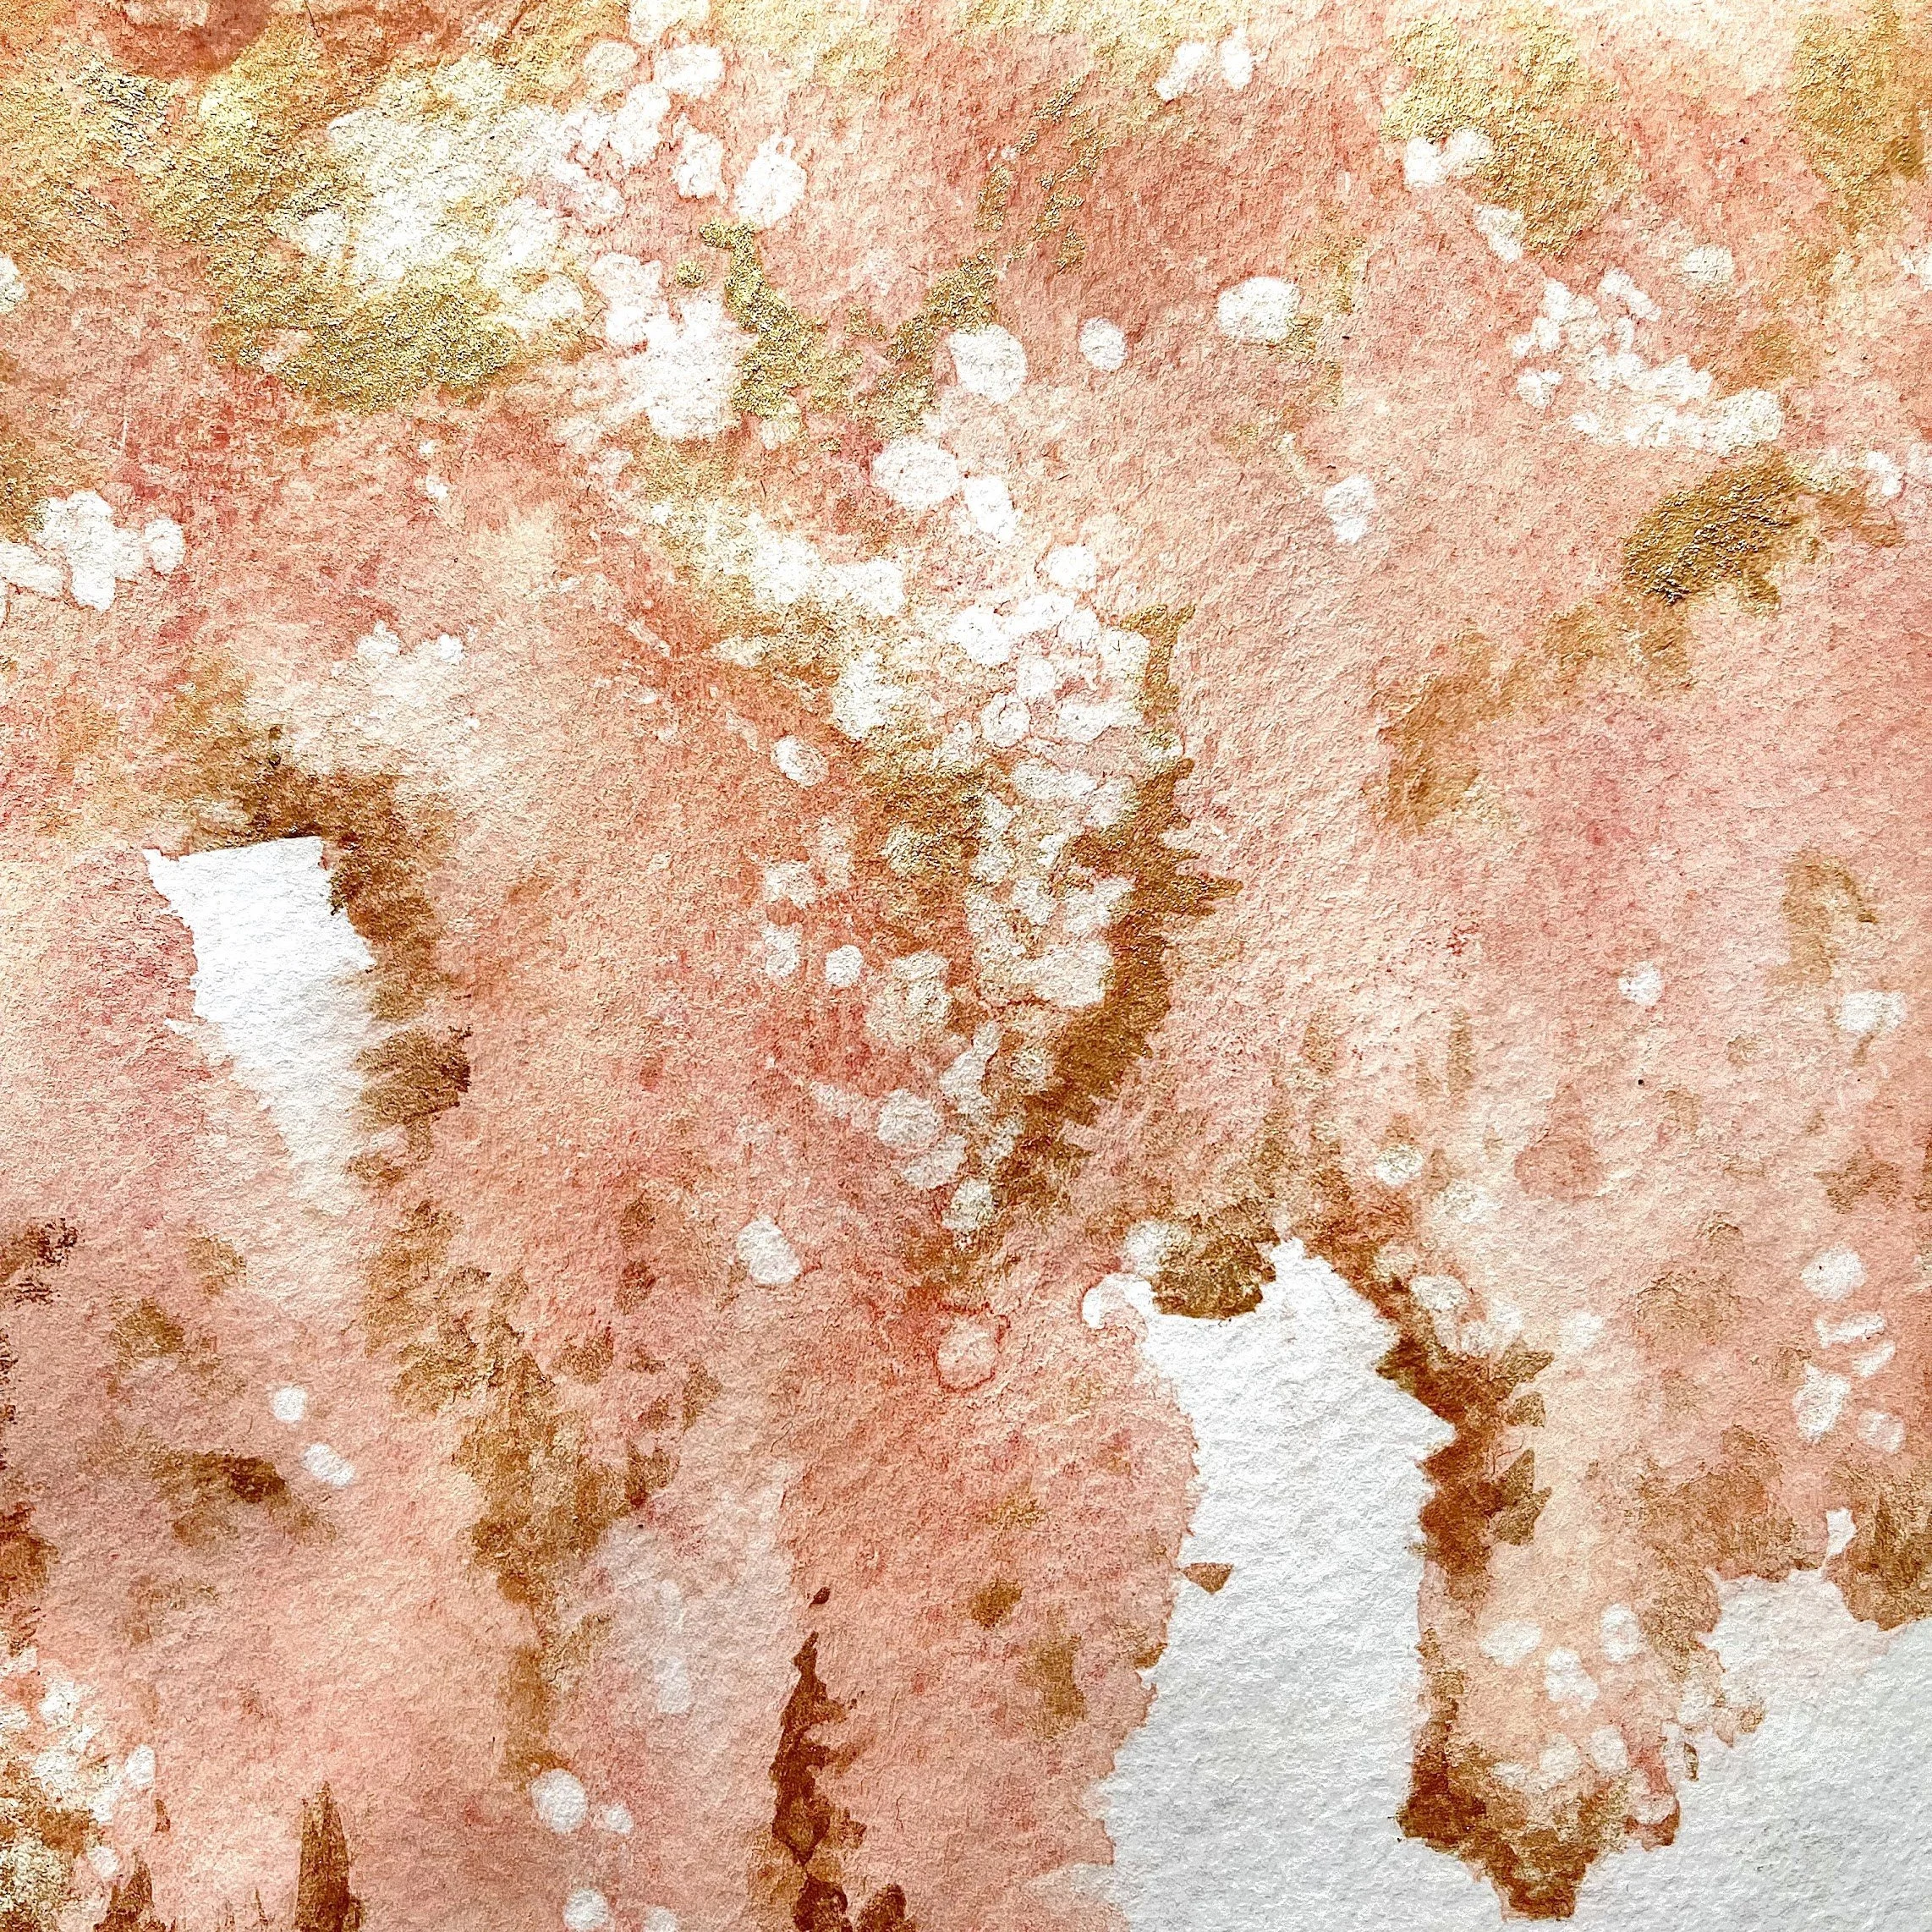
Once the paint is dry, gently brush off the salt. You'll be left with a beautiful texture that looks like snowflakes or crystals.
You can continue to layer colors and repeat this process to create even more texture and interest in your painting.
Tips:
Experiment with different colors and salt sizes to create unique textures.
Don't use too much salt, as it can create a muddy effect in your painting.
Try combining rock salt with other texture techniques, such as masking fluid or splattering, to create a more complex piece.
Using rock salt to add texture to your watercolor paintings is a fun and easy way to elevate your artwork. Give it a try and see how it can enhance your paintings!
Share your outcomes with me on Instagram by tagging me @felicityandink and using #felicityandinkteaches